Guide: Launch Your First Advertising Campaign
You’ve registered on Push.House but now you don’t know where to start. We all have been there. Don’t worry! We’ve created a detailed step-by-step guide to help you set up and launch your first advertising campaign on the advertising network. We designed our user interface so that creating an advertising campaign will take you no more than 5 minutes. Follow the steps described in this guide and see for yourself how easy it is to create and launch an advertising campaign.
If you encounter any difficulties or have any questions during the setup process, feel free to contact our support. We’ll do our best to resolve them as quickly as possible.
Push.House User Menu
The advertising network menu includes all the tabs you need for convenient work.
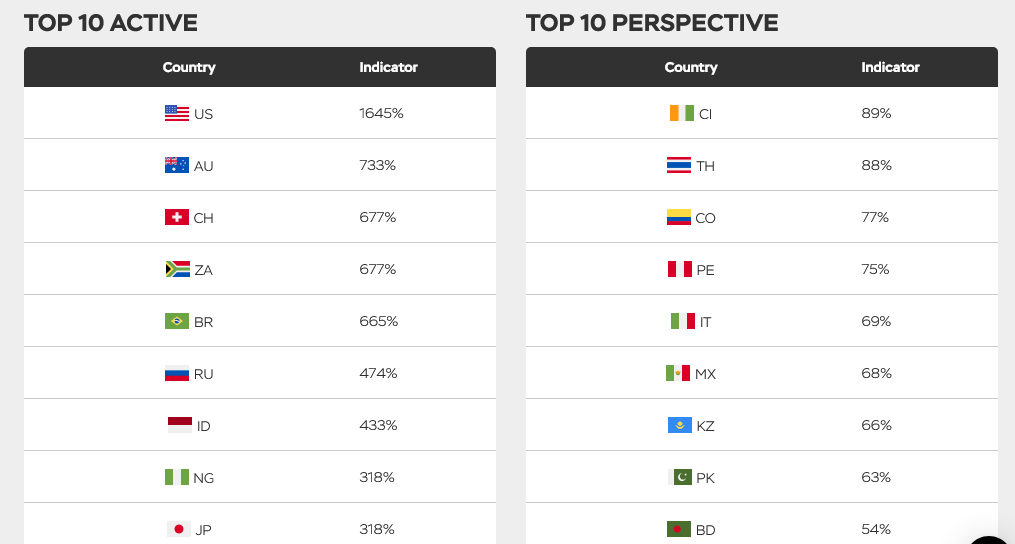
1. Dashboard: Provides a brief overview of launched advertising campaigns, as well as top-performing and promising GEOs.
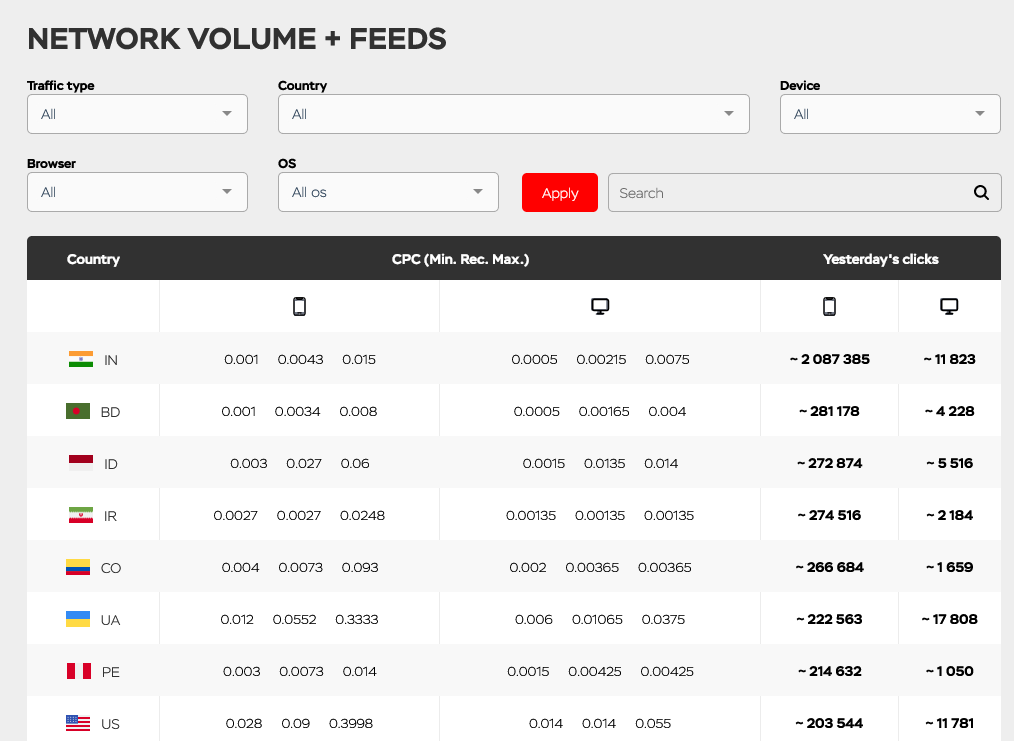
- Network Volume: This menu section offers detailed statistics on the minimum, recommended, and maximum click prices in top GEOs. It also provides information about the number of clicks in the last 24 hours. You can sort the data by traffic type, country, device, browser, and OS.
- Create Campaign: A menu for creating campaigns, which we’ll return to later.

- Campaign List: Displays all campaigns created in Push.House.

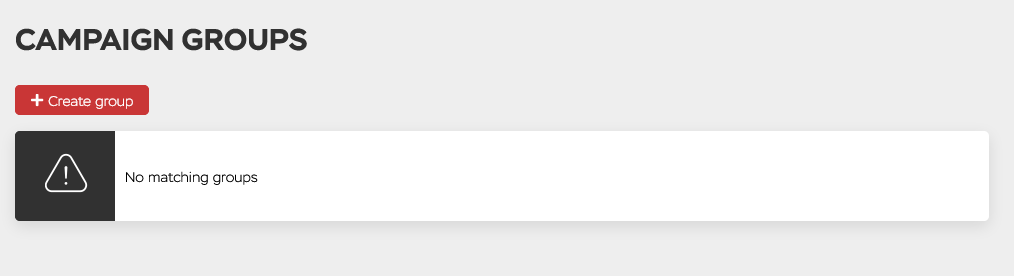
- Campaign Groups: This menu section contains information about all created campaign groups.
- Statistics: A monitoring and statistics section for your advertising campaigns. You can sort the data by months, days, hours, formats, GEOs, sources, browsers, campaigns, site IDs, feeds, and devices.

- Tracking: A menu for configuring the tracker and setting up postbacks for detailed statistics tracking.
![]()
- Finances: A tab for selecting a payment system and replenishing your account’s balance.

- Audiences: A menu for creating white and black lists. An important section during the optimization of your future campaign.
- Support: A section for submitting requests in case you encounter any difficulties while working with the advertising network.
- Bonuses: Information about services and bonuses provided by Push.House partners.
- Rules: The network’s rules, including definitions, general terms, terms of use, prohibited materials, responsibility, finances, and refund policy.
- FAQ: A menu section with answers to the most common questions about using Push.House and detailed guides on using the platform.
- Telegram: A link to the Push.House & Partners.House Telegram channel. Here, you can also find answers to some questions or exchange experiences with other advertisers.
Contact the Push.House manager to get started
Creating an Advertising Campaign on Push.House
To create an advertising campaign on Push.House, click on “Create Campaign” in the left menu of your personal account.

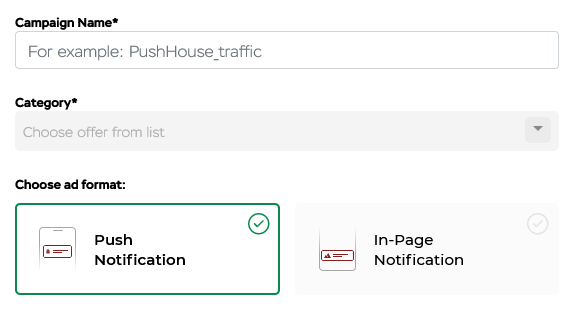
1. General Information
- Campaign Name: The name must be between 3 and 95 characters. You can use any name, but to find them easily in the future, we recommend using words that can easily describe the campaign. These could be offer names, payment models, and so on.
- Vertical: Choose a vertical from the list of options provided:
- Dating
- Finance
- Nutra
- Antiviruses
- Sweepstakes
- Betting
- Gambling
- Crypto
- Apps
If your offer’s vertical is not listed, select “Other.”
- Ad Format: Choose one of the offered advertising formats:
- Push Notification: Classic push notifications that effectively monetize traffic through user interactions on a website. Notifications are displayed on the website page after the user consents to subscribe. Works on all platforms and Google Chrome browsers.
- In-Page Notification: A unique advertising format that combines banner advertising and push notifications. In-Page Push does not require subscription and works on all platforms and browsers.
- Target Page: Specify the URL of the offer’s target page. Use macros for automatic statistics collection:
{click_id}: Click ID
{site}: Traffic source ID
{camp}: Ad ID
{pdpid}: Subscription ID
{price}: Click cost
{feed}: Feed
{country}: Country
{city}: City
{os}: Operating system
{browser}: Browser
{format}: Ad format
{lang}: Browser language
- Payment Model: In Push.House, the standard payment model is CPC (Cost Per Click), where advertisers pay for each click on the advertising ad.
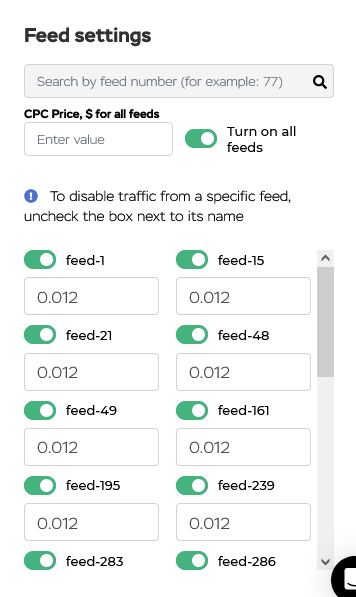
2. Traffic Settings
Here, you can choose subscriber databases: traffic from the Push.House database and feeds that include traffic from carefully selected partners.
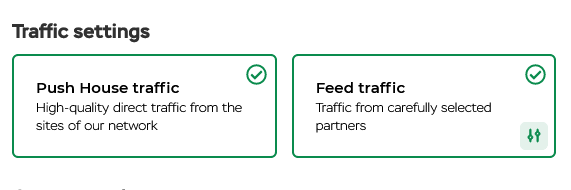
To disable a feed, click the switch next to its name.
3. Country and Bid
- Country and Click Cost: Specify the country where you plan to promote your advertising campaign. The system will automatically assess the auction in the selected GEO and suggest the recommended and maximum click cost. You can set your own click cost or approximate it to what the system recommends.

- City: Add or exclude specific cities and regions. You can do this by toggling the “On/Off” switch.

- Group: You can add the created campaign to the desired group here.
- Audiences: In this section, you can select an audience from the list of existing ones. To add a new one, click the “+” icon. In the future, you can set up targeting by platforms, IP range, and retargeting in the “Audiences” section.

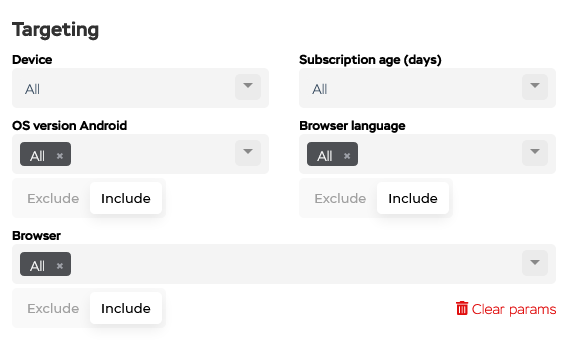
4. Targeting
- Device Type: Choose the device type: mobile device or desktop. Click costs for desktop are 50% lower than click costs for mobile devices.
- Android OS Version: If necessary, specify the Android OS versions you want to include or exclude. If the “Enable” indicator is switched on, ads will only be displayed on the selected OS versions.
- Subscription Age: Specify the subscription age for push notifications (from 0 to 30 days). The younger the subscription, the higher the traffic cost.
- Browser Language: Specify or exclude the browser language you want to target.
- Browser: Include or exclude browsers you want to target your advertising campaign at.
- Total Campaign Budget: Specify the total funds limit that you plan to spend on this campaign.
- Daily Campaign Budget: Specify the daily funds limit that you plan to spend on this campaign.
- Total Click Limit: Specify the total click limit that you plan to get on this campaign.
Daily Click Limit: Specify the daily click limit that you plan to get on this campaign.
5. Campaign Schedule
Specify the time of day for displaying advertising ads. Using the menu at the top of the block, you can set automatic display only on business days or only on weekends.
6. Advertisement
Advertisement Settings Menu. This is where you configure your creatives. To obtain accurate data from the test and find the most effective creative variations, it’s recommended to create at least 2 advertising combinations (Logo + Large Image + Text).
- Badge: Select an icon that offers options for actions with push notifications. The badge should match the vertical of your offer and lead to a logical target action.

- 18+ Creative: If the creative contains adult materials, don’t forget to mark it with the “Yes” icon to protect children from potential viewing.
- Button Text: You can specify the text for push notification buttons. The default text is “View” and “Settings.” It should be no more than 15 characters, including emojis.
- Title: Specify the notification title. For tips on writing a clickable title for push notifications, you can read this article. It should be no more than 30 characters, including emojis.

- Description: Specify the ad description. It should be no more than 45 characters, including emojis.
- Images: Upload an icon (192×192 px; jpg; jpeg; png) and the main image (492×328 px; jpg; jpeg; png).
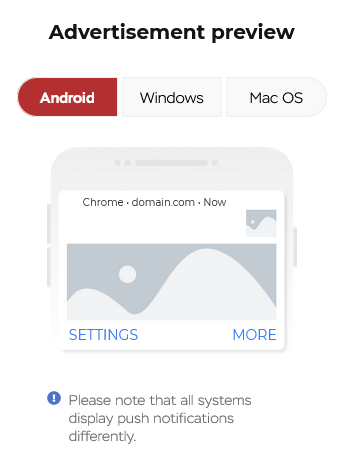
Click the “Preview” icon to view the creative.

The system will offer a preview of the ad on Android, Windows, and Mac OS.
Before launching the campaign, you can check the “Stop After Moderation” checkbox. If you don’t check this box, the campaign will be automatically launched after moderation.
If the campaign is successfully added, it will appear in the “Campaign List” tab.

Congratulations! Your first advertising campaign on Push.House is created and waiting to be launched!
Contact the Push.House manager to get started